Monday, June 25, 2012

The White Balance Tool of Photoshop Express

First, let's check what white balance means in the world of photography.  White balancing removes unrealistic color translations so if an object appears to be white in the real world, the object should appear exactly the same in the picture.

Our eyes are very accurate at checking what is white regardless of light conditions, but cameras have difficulty on auto white balancing.  This difficulty explains why some pictures come out bluish, orangey or even greenish.  This is what the white balance tool in Photoshop Express aims to fix.

Again, I will be showing the original photo followed by how the same photo will look with different white balancing levels applied:

Original picture:


First level white balance:


Second level white balance:


Third level white balance:


Fourth level white balance:


Fifth level white balance:


Sixth level white balance:


Seventh level white balance:


Wednesday, June 20, 2012

Color Saturation Adjustments in Photoshop.com

Saturation in the world of photography is quite different from what we've all come to know in the real world. Saturation in its most basic definition is the amount of liquid absorbed.  For example, the amount of water absorbed by a hand towel, or the amount of water absorbed by a bowl of oatmeal.  If the oatmeal has absorbed a lot of water, then it is highly saturated.

On the other hand, in photography, saturation is the color being reflected back to us.  For example if a shirt appears to be color yellow, then that means that it absorbs all colors except the color yellow, which is the color reflected to us.

That's the shortest definition of saturation, we can go into the details, but that would definitely bore you.  I just gave you the introduction so you can have more appreciation of what the saturation tool in the online Photoshop tool can be used for.

Again, here is the sample photo with different saturation settings applied.

This is the original image, no saturation adjustments yet:


Here is the same photo with saturation setting 1 applied, as you can see, the image has turned to grey scale:


Saturation setting 2 applied:


Saturation setting 3 applied:


Saturation setting 4 applied, starting with this setting, the colors now become more saturated:


Saturation setting 5 applied:


Saturation setting 6 applied:


Enhanced by Zemanta

Monday, April 4, 2011

What Does the Touch Up Tool Do?

The Photoshop Online Express Editor comes with a touch up tool.  The touch up tool does exactly that, touch up.  The touch up tool is very useful for adjusting pictures of people, specially close ups.  Using the touch up tool, you can enhance faces by hiding freckles or moles or in other words, smoothening faces.

To use the touch up tool, click on touchup from the Edit tools on the left hand side of Photoshop express editor. Select the area you want to enhance and select the area you want to copy from:


The green circle indicates the are where the touch up will be applied and the red circle indicates which area the touch up will copy from.
Enhanced by Zemanta

Tuesday, March 29, 2011

What Does the Exposure tool do?

The exposure tool simply adjusts the image's brightness.  Photoshop has 6 different settings for the exposure.

Here is the original image without applying any changes:


Click on the Exposure tool on the left side of the screen under the Basic tools, this will bring up the screen where you can choose from the different exposure settings.

Here is how the same picture will look with the different settings:

This is the picture with the first exposure setting applied.

This is the picture with the second exposure setting applied.

This is the picture with the third exposure setting applied.

This is the picture with the fourth exposure setting applied.

This is the picture with the fifth exposure setting applied.

This is the picture with the sixth exposure setting applied.

As you probably noticed, the settings are arranged from darkest to brightest exposure.


Enhanced by Zemanta

Tuesday, September 14, 2010

What Does Auto Correct Do?


Photoshop online has a tool called "Auto Correct", this will adjust lighting and contrast based on your preferences.  To use the Auto Correct function in the Photoshop Express Editor:


Click on the Auto Correct function under the Basic tools on the left side of the Photoshop Express Editor.  Once you click on the auto correct button, there will be 6 thumbnails at the lower portion of the screen, just below the image you are editing.  Click on any of these 6 thumbnails to preview how the Auto correct function adjusts your image.  Once you see the image you like best, click on done and save your adjusted image.

Here is how the different settings look on the sample picture we have:

This is the picture with the first settings applied.

Setting 2 applied.

Setting 3 Applied

Setting 4 Applied

Setting 5 Applied

And the last setting applied.

You can play around and check which setting you prefer most based on your original picture.
Enhanced by Zemanta

Tuesday, September 7, 2010

Photoshop Express Editor - How to Rotate Images


Here's a quick lesson on how to rotate a picture using Photoshop.com express editor:

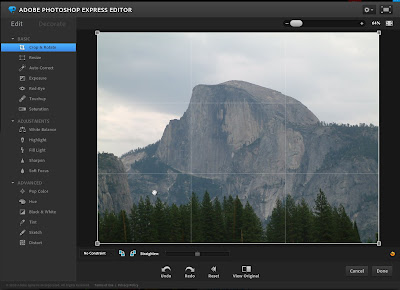
First, you will need again to upload the image you want to rotate. Click on the Crop and Rotate function:


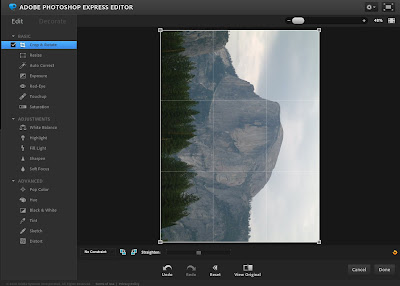
Once again, the squares come on top of your picture which means you are in edit mode. Click on the Rotate Right (Clockwise) or Rotate Left (Counter Clockwise) icon depending on how you would want to rotate.

Here is the rotated image, click on Done to save your picture.


Monday, September 6, 2010

Photoshop Express Editor - How to Crop Images

There are some pictures which you would want to cut or crop due to various reasons (ex. you want to remove your ex from a very nice picture :)) For this you can use the Photoshop express editor crop tool. For this tutorial, I will be using one of the sample pictures that came with Photoshop.com. For the real thing, you can upload the image you want to crop.

From the main page of the Photoshop express editor, click on Crop and Rotate:


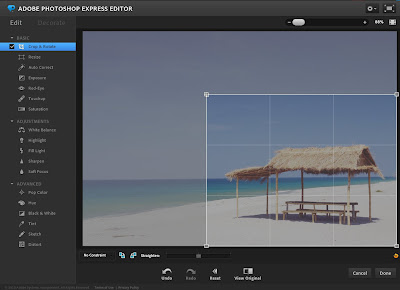
Once you click on the crop and rotate tool, a square with handles on each corner will appear over your picture, drag the handles to resize the square, whatever is inside the square will be the picture that will be left after cropping:


Click on Done to proceed with the cropping of the image, if you haven't save the picture yet, you will be prompted to save it, you can choose whether to save as maximum size or thumbnail.


Here is your final cropped photo.